With the windows operating system, you get a special service by default which is known as Diagnostic Policy Service. But if some how it is not running and showing an error message then follow few basic methods to fix Diagnostics Policy Service (DPS). This error may arise due to corrupt associated files.
Read the article to gain more information on the Diagnostic Policy Service and how to fix if it is not running.
What is Diagnostic Policy Service?
The Windows Diagnostic Policy Service is an important windows service which not only detects the issues within your system, but it can also help to identify and troubleshoot the problems. In case the Diagnostic Policy service is stopped, the windows will no longer detect and diagnose the potential errors in the system.
How to Fix it is Not Running:
Indeed, there are a few reasons concerning why the Diagnostic Policy Service is not running. Usually the error occur due to corrupt or damaged files. Some of the reasons are as follows:
- Diagnostic Policy Service has been disabled.
- The network adapters are outdated or it is corrupted.
- The Local and the Network service does not have the administrator privileges.
Implement the methods mentioned in the next section, in order to fix the Diagnostic Policy Service not running error.
Quick Overivew
Fix 1: By enabling the Diagnostic Policy Service
The windows diagnostic policy service might be disabled on your PC, hence you will have to enable it. Here is how you can enable it using the Services application.
1. Press Windows + R button
2. Type services.msc and click on OK
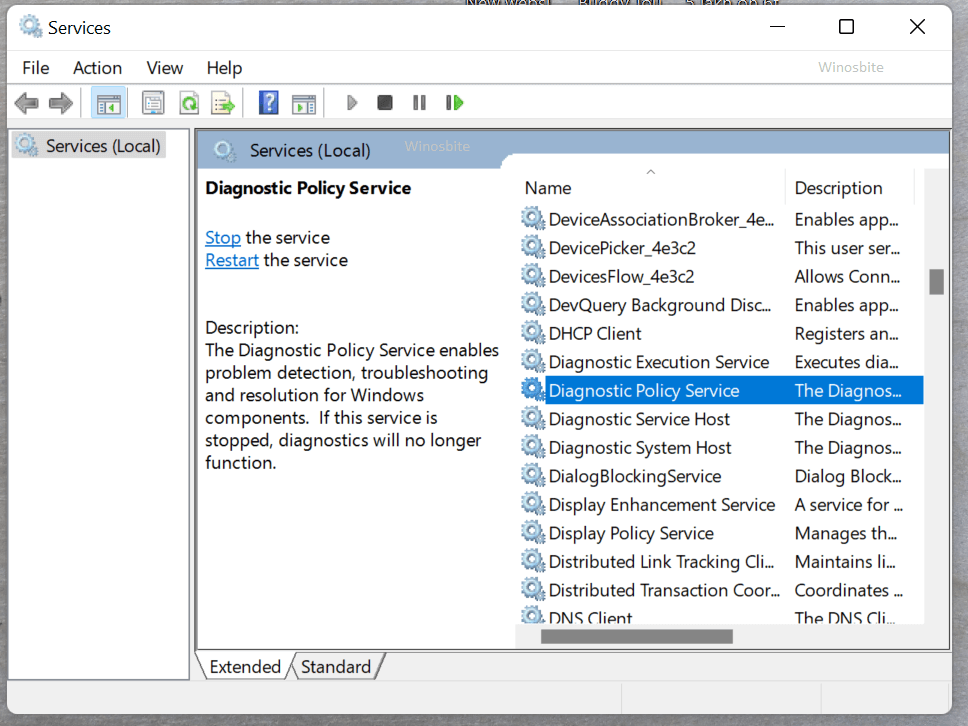
3. Now locate ‘Diagnostic Policy Services’ as shown below
4. Now double click on it
5. Under the ‘General tab‘, click on the box of Startup type: in order to expand it.
6. Select ‘automatic’ from the dropdown.
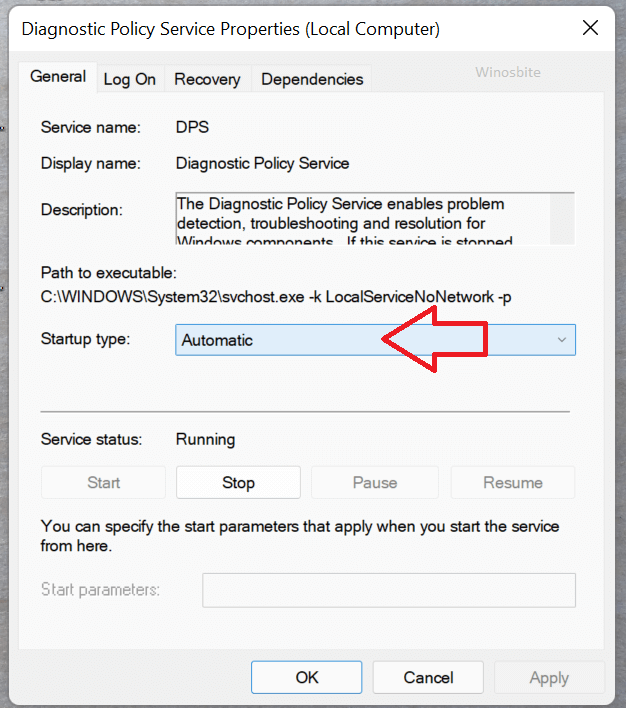
7. After this click on Apply and then click on OK to save changes.
Fix 2: By granting the Network And Local Service Administrator Privilege
Well the Diagnostic Policy services might fail to run, in case the Local and the Network service does not have the administrator privileges. To grant administrator privilege, follow the steps mentioned below.
1. Search for Command Prompt in the Windows search bar.
2. Now, right-click on it and choose Run as Administrator
3. Next, copy the command given below and paste the command in the Command prompt space and hit Enter.
net localgroup Administrators /add networkservicenet localgroup Administrators /add localservice
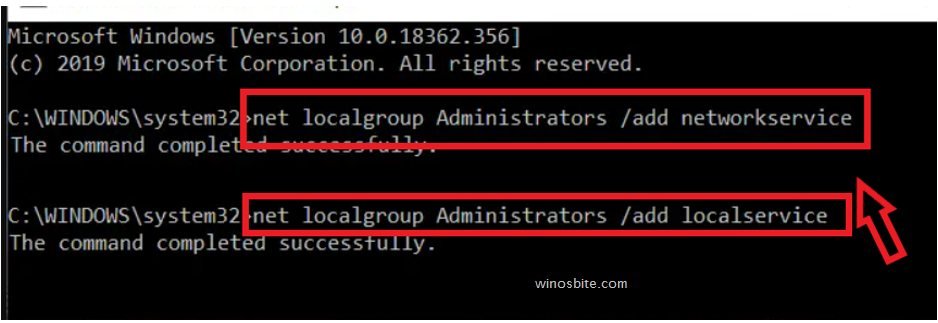
4. Now, wait for the successful execution of the entered command.
5. Once the command is executed successfully, just Reboot your PC to save your settings.
In case, this method does not resolve your problem, try the next method.
Fix 3: By reinstalling the Network Adapters
In case the network adapters is corrupted, the Windows Diagnostic Policy Service will stop running. And hence reinstalling the network adapters can help you start the Windows Diagnostic Policy Service.
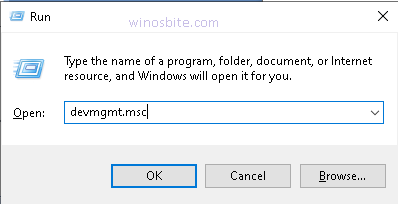
1. Press the Windows + R button to open the RUN application.
2. Type devmgmt.msc and click on OK.
3. Now among all the devices find, Network adapters.
4. After finding Network adapter, double click on it to expand it.
5. Now right-click on the Network adapters, and select Uninstall device.
6. Repeat the above steps to uninstall all the Network adapters available.

7. After that click on Action from the menu and then click on Scan for hardware changes.
Note: If you have Windows 11 or 10 then it will automatically install the network adapters for you, hence you will not have to manually install the Network adapters.
In case reinstalling the Network adapters, has not helped you then try the method mentioned below.
Fix 4: Run SFC or DISM Scan
Many Windows users have reported that they were able to start the Diagnostic Policy Service on their PC, after performing an SFC scan. Here is how you can perform SFC scan on your system.
1. Open the Command Prompt with admin access
2. Type sfc /scannow and press the Enter key.

3. Now wait for the scan to complete, it will automatically fix the corrupted files.
4. After the scan is complete, reboot your PC.
In case, the SFC scan has not worked for you, then you an try performing the DISM scan. Here is how you can do so.
1. Open the Command prompt in administrator mode, as directed above.
2. Now Enter the commands, mentioned below in the same sequence, and press Enter after each one.
Dism /Online /Cleanup-Image /CheckHealthDism /Online /Cleanup-Image /ScanHealthDism /Online /Cleanup-Image /RestoreHealth
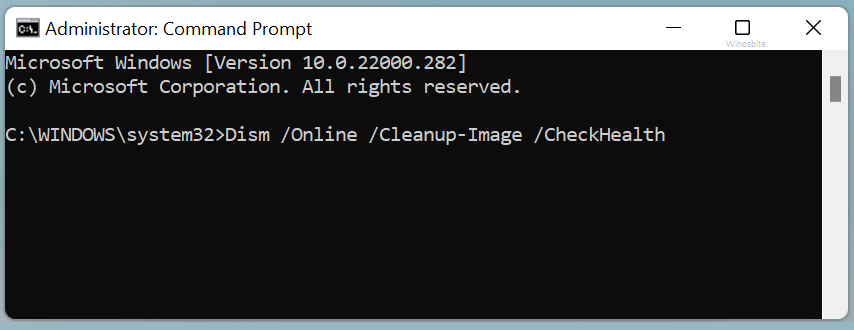
3. Now wait for the scan to complete.
4. After the scan is complete, reboot the PC, to save the changes. Method
Fix 5. By performing System Restore
In the event that the above method doesn’t work for you, then you can try to restore the system to a state before any Windows update, or any applications installed on your PC.
Note: This method is intended for those who have already created a restore point before updating the Windows or before installing any new application.
1. Type Restore in the Windows search bar.
2. Now click on Create a restore point.
3. Next, switch to the System Protection tab.
4. Now, click on System Restore.

5. Now click on Next button.

6. Now click on the desired restore point, and then click on Next.
7. Now, just follow the onscreen instructions to restore your system to your desire state.
Fix 6. Reset this PC
If all above method not work then try the last option called Reset this PC that will definitely fix the Diagnostics Policy Service error. But try this method only when there is no option left.
1. Press the Windows button on keyboard
2. Type Reset and choose Reset this PC
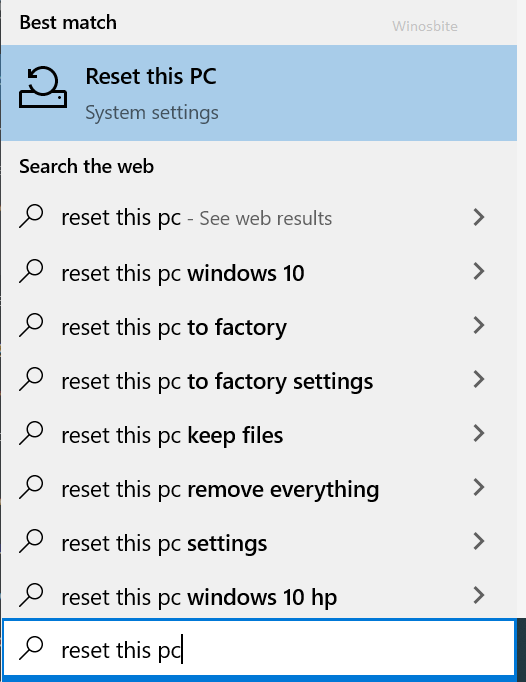
3. Now click on Get Started (for Windows 10) or Reset this PC button (for Windows 11)

4. Now choose the first option that says “Keep my files” 
5. And then follow the rest wizard.
6. During that process, the pc will restart for couple of times, don’t do anything.
Once reset process is over then you can star using your system without facing any Diagnostic Policy Service error.
So this was all about the Windows Diagnostic Policy Service and how to fix it if it is not running. In case you have any queries, you can comment below, and we will try to help you out.

