
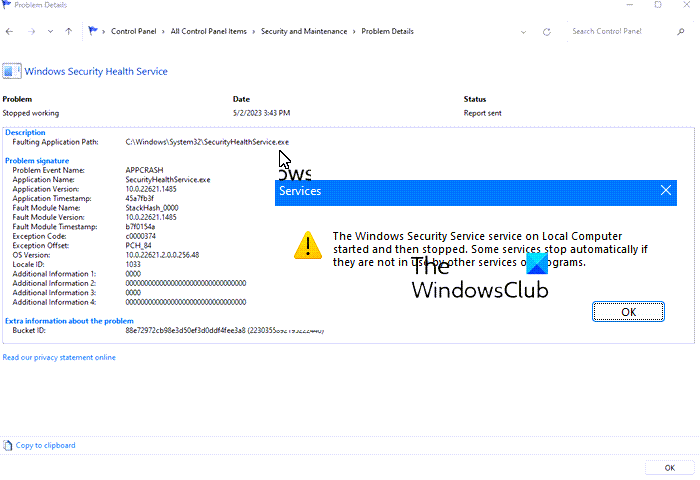
If you are facing problems with Windows Security and seeing a message that says Windows Security Service or SecurityHealthService.exe started and then stopped working, then this post is sure to help you.
Why does securityhealthservice.exe crash in Windows 11?
The reason why securityhealthservice.exe is crashing quite often probably has a lot to do with corruption or missing system files. Sometimes, your Windows 11 computer may require an update to get things back on track.
Fix SecurityHealthService.exe crashing or stopped working
If you have encountered a problem with SecurityHealthService.exe crashing, then the suggestions here should help a great deal.
- Restart Windows Security Service via Services Manager
- Reset the Security Health Service
- Reinstall Windows Security using the Powershell command
- Run SFC and DISM
1] Restart Windows Security Service via Services Manager
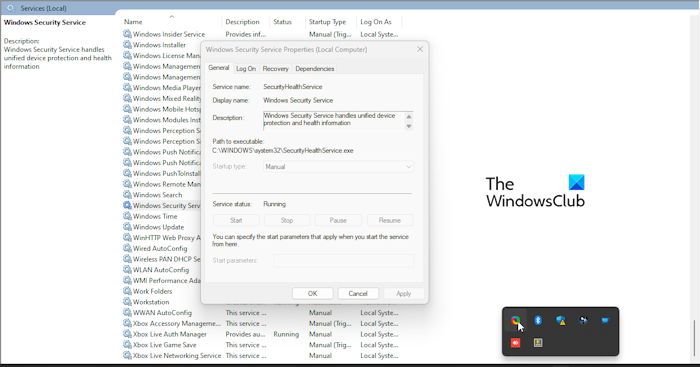
Restarting the Windows Security Service is the first thing we should do here, and it must be done via the Service Manager. So, with that in mind, let us explain what needs to be done.
- To begin, you must right-click on the Windows key, then select Run from the context menu.
- After that, type services.msc, then hit the Enter key.
- Doing the above should open the Services Manager window.
- Go ahead and scroll down to the bottom until you come across Windows Security Service.
- Double-click on it to open the Properties window.
- From this window, please click on the Stop button, then select Apply > OK.
Restart your computer and Windows Security Service should automatically restart. If that doesn’t happen, then follow the steps above and return to the Properties window where you can simply click on the Start button.
READ: Security Intelligence Update not installing automatically
2] Reset the Security Health Service

We must now move to reset the Security Health Service in hopes things will return to normal.
To do this, you must open PowerShell.
Please run it as an administrator.
From there, please copy and paste the following command directly into PowerShell:
Get-AppxPackage *Microsoft.SecHealthUI* | Reset-AppxPackage
After that, hit the Enter key on your keyboard.
When the process has run its course, go ahead, and restart the computer.
See this post for additional ways to reset the Windows Security app. Resetting Windows Security will also reset this Service and all other related components.
Similar: Reset Windows Security Settings to default values
3] Reinstall Windows Security using the Powershell command

Another way to set things right where Windows Security Service is concerned is to reinstall it via PowerShell. How do we get this done? well, let us explain.
First, you must open PowerShell by clicking on the Windows key, then search for PowerShell.
Once done, please open the tool as an Admin.
Next, you must type the following command:
Get-AppxPackage *Microsoft.Windows.SecHealthUI* | Reset-AppxPackage
Hit the Enter key on your keyboard to execute the command. All you have to do now is wait a few seconds, then close PowerShell to complete the process.
4] Run SFC and DISM

Another method to fix the issue relating to Windows Security Service is to run an SFC scan. Not only that, but we also suggest running a DISM scan as well, so let us explain how to accomplish these tasks.
To run an SFC scan, you must open the PowerShell application.
From there, type the following command:
sfc /scannow
Hit the Enter key on your keyboard, then wait.
In terms of running DISM in a bid to fix the Windows 11/10 system image, we suggest running DISM to repair Windows System Image along with Windows Component Store.
READ: Windows Security Service missing after malware attack
How do I fix Windows Security?
The best way to fix issues relating to Windows Security is to repair and reset the service. To repair it, please press the Windows key + I to open the Settings menu. From there, select App, then go to Installed Apps.
- Press the Windows key +I to open the Settings app.
- From the left side, click on App Settings.
- Search for Windows Security under Installed Apps.
- Select Advanced Options after clicking the three-dotted button.
- On the next page, click on the Repair button in Settings. Next, click on the Repair button, then select Repair again to confirm your choice.
If that doesn’t work, then go ahead and reset Windows Security, and that should complete the job.
