
This post will show you how to install Windows 11 in Hyper-V Virtual Machine. We will use Hyper-V, and not VMWare or VirtualBox because Hyper-V is a native feature of Windows. It is available for free. It also delivers decent guest OS performance compared with its competitors.
ADVERTISЕMENT
Hyper-V creates a virtualized computer that runs a guest OS on top of a physical host. Such a virtualized environment works much similar to a physical computer. However, it exists in an isolated environment. Hyper-V includes a hypervisor, a special software that controls access to physical hardware resources by the virtual environment.
Virtualization has a number of advantages. For example, it allows to quickly restore a system to its previous state with snapshots. It also enables quick deployment of computer systems. Once a virtualized instance configured, you can migrate the system between physical hosts.
Hyper-V is available on 64-bit versions of Windows 11, in Pro, Enterprise, and Education editions. It is not available on the Home edition.
This post will show you how to create a Hyper-V virtual machine with and install Windows 11 in it.
I assume that you already have a bootable ISO image of Windows 11. If not, download it right now.
Install Windows 11 in Hyper-V Virtual Machine
To install Windows 11 in a virtual machine with Hyper-V, you need to perform the following steps.
- Enable the Hyper-V feature in Windows.
- Create and configure a new virtual machine in the Hyper-V Manager tool.
- Install Windows in the Hyper-V Virtual machine.
Let's get everything done.
1) Enable the Hyper-V feature
- Press the Win + R shortcut keys to open the Run dialog.
- Type
optionalfeaturesin the Run dialog to open the Windows Features dialog.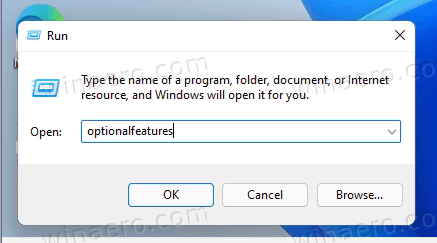
- Check the entry Hyper-V and all its subitems.
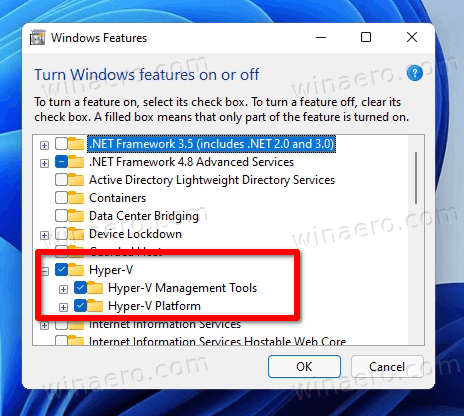
- Restart Windows when prompted.
You now have Hyper-V enabled. Let's create a new virtual machine to install Windows 11 on it.
2) Create a new Hyper-V virtual machine
- Open Hyper-V Manager from the start menu or with the
virtmgmt.msccommand in Run (Win + R).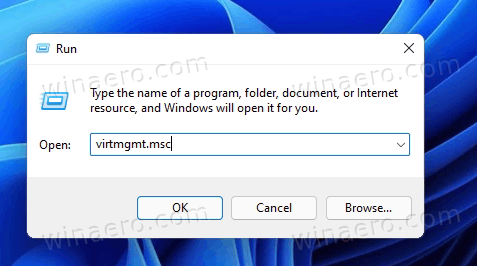
- Right-click the host computer in the left column, and select New > Virtual machine from the menu.
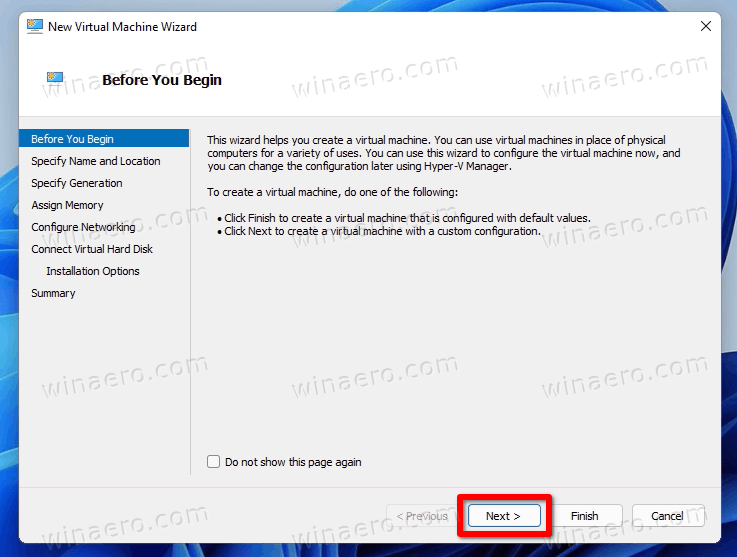
- Click Next in the welcome wizard.
- Name your new VM, like "Windows 11".
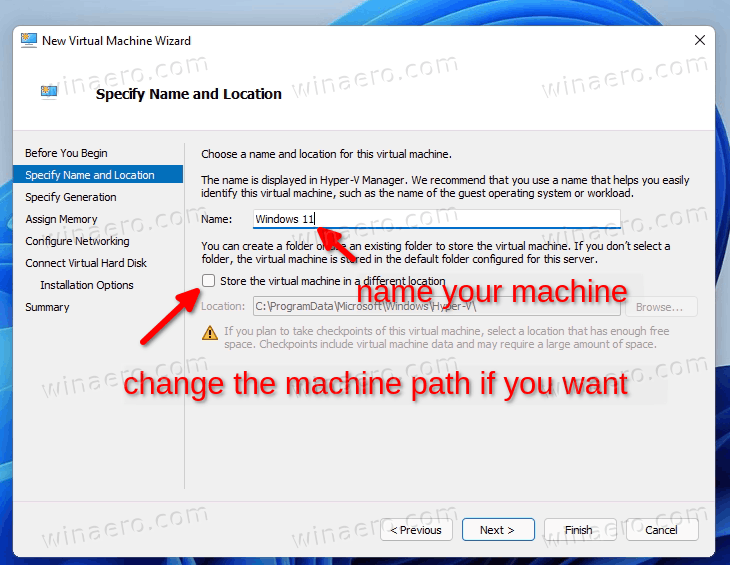
- Optional: If you want to store the virtual machine under a custom location, check the Store the virtual machine in a different location option, and select the drive and/or folder. Click Next.
- Select Generation 2, and click the Next button.

- Specify the memory size in MB for your VM. Windows 11 requires at least 4096 MB.
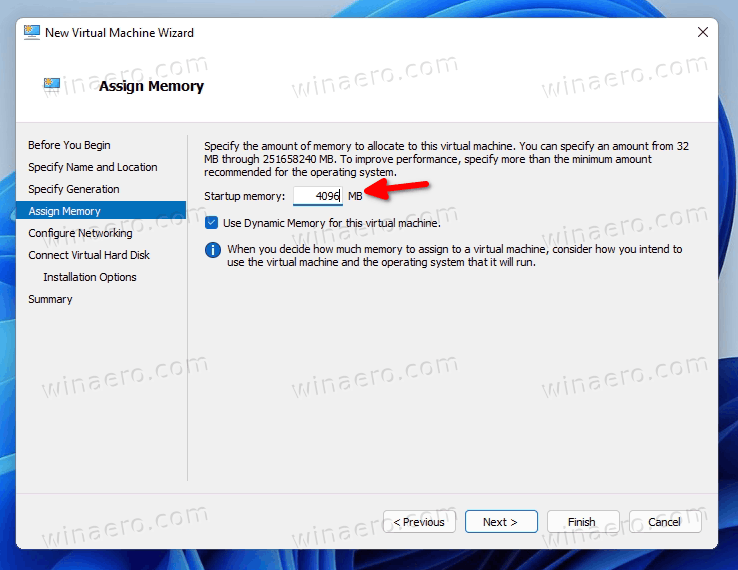
- If you remove the check mark from Dynamic Memory, all the specified memory size will allocated from the host computer once you start the VM.
- If you turn on Dynamic Memory, the specified memory size is only allocated on demand.
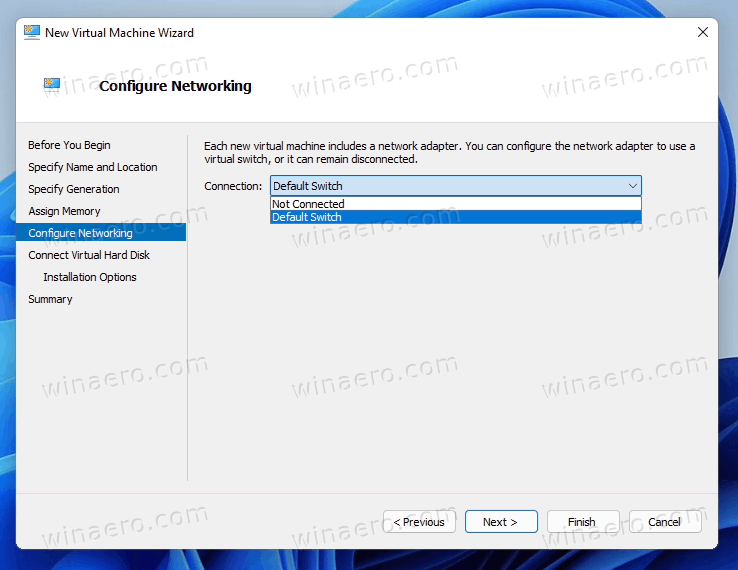
- On the next page, select Default Switch to connect the virtual machine to network.
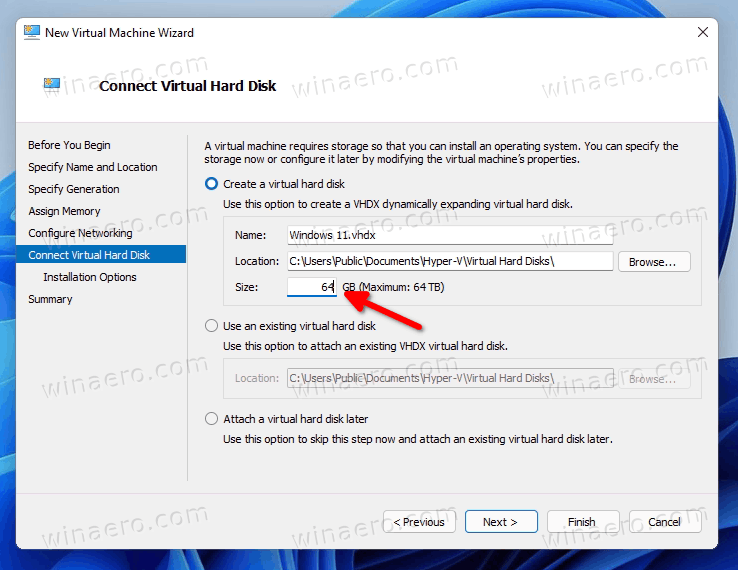
- On the next page, you will be able to customize the virtual drive for the virtual machine. Specify its size, minimum 64GB for Windows 11, and click Next.
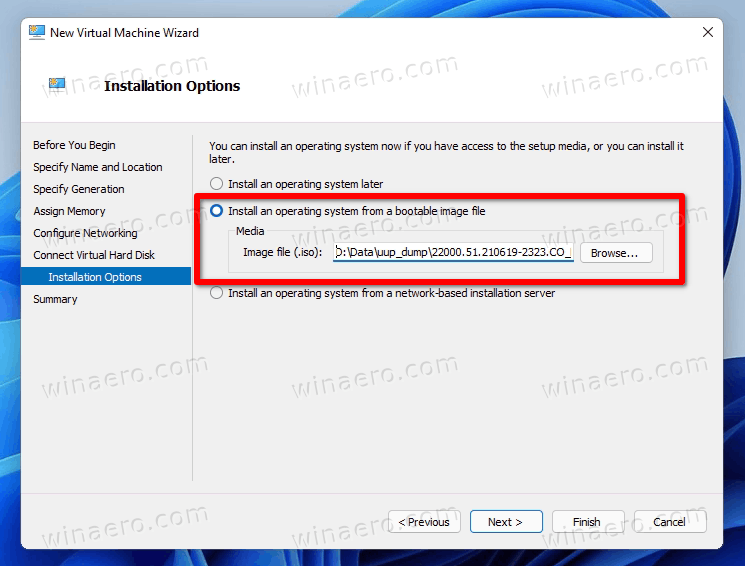
- Select Install an operating system from a bootable image file , and select your Windows 11 ISO image.
- Click on finish.
Congrats, you have created and configured your Windows 11 virtual machine. You are now ready to install the Windows 11 OS.
Do the following.
3) Install Windows 11 on a virtual machine in Hyper-V
- In Hyper-V Manager (
virtmgmt.msc), right-click the virtual machine, e.g. "Windows 11", and select Settings from the menu.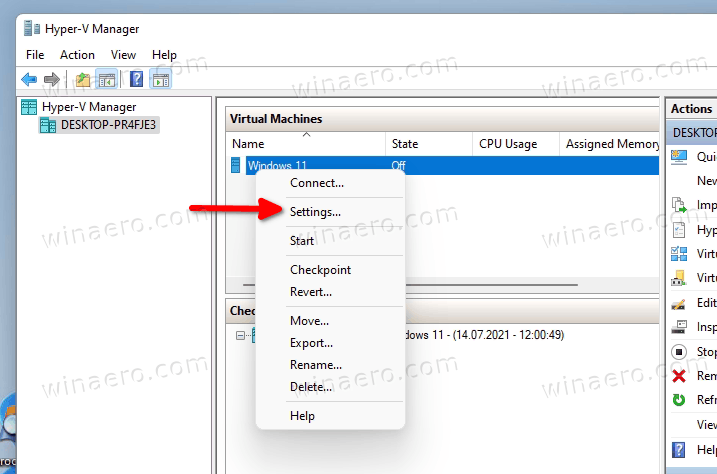
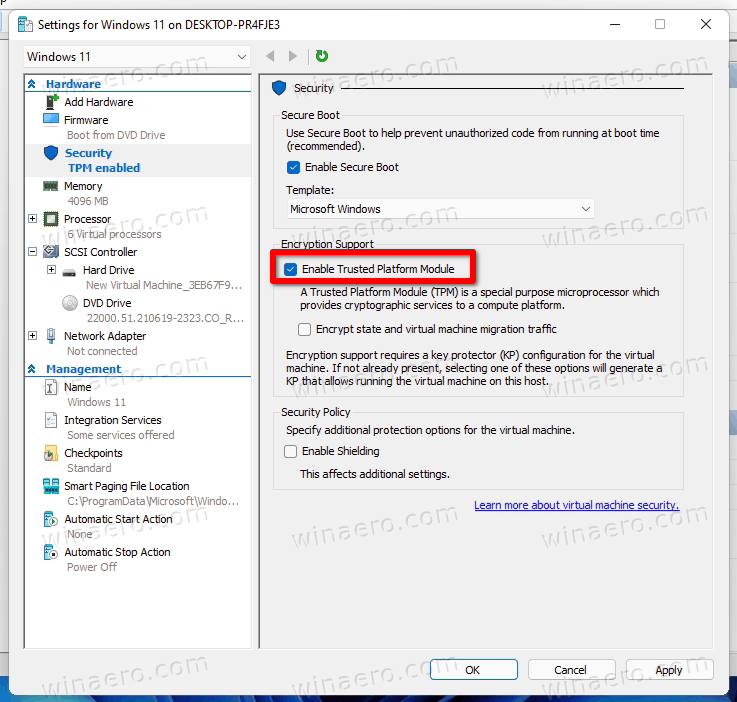
- Select Security in the left pane.
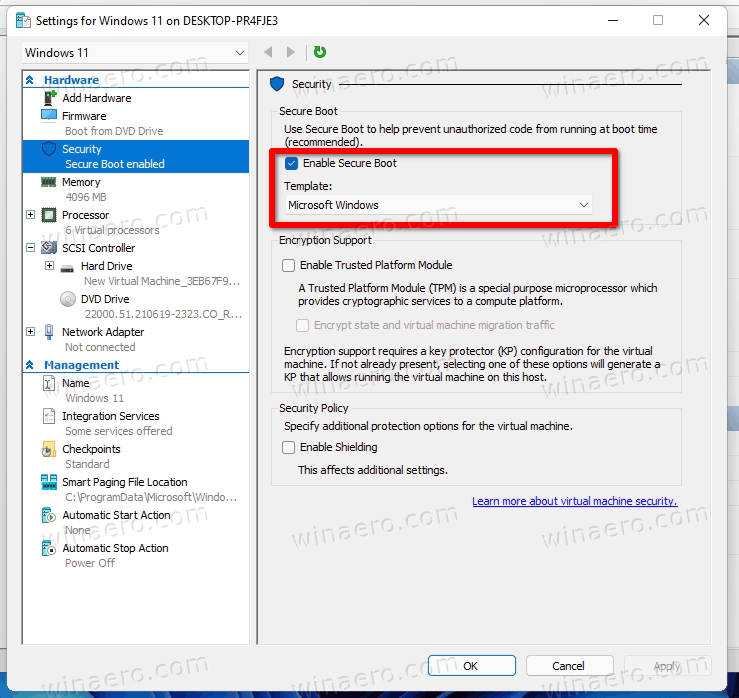
- On the right, make sure you have the following options enabled: Enable Secure Boot, Enable Trusted Platform Module. If not, enable them (check), and click on Apply.
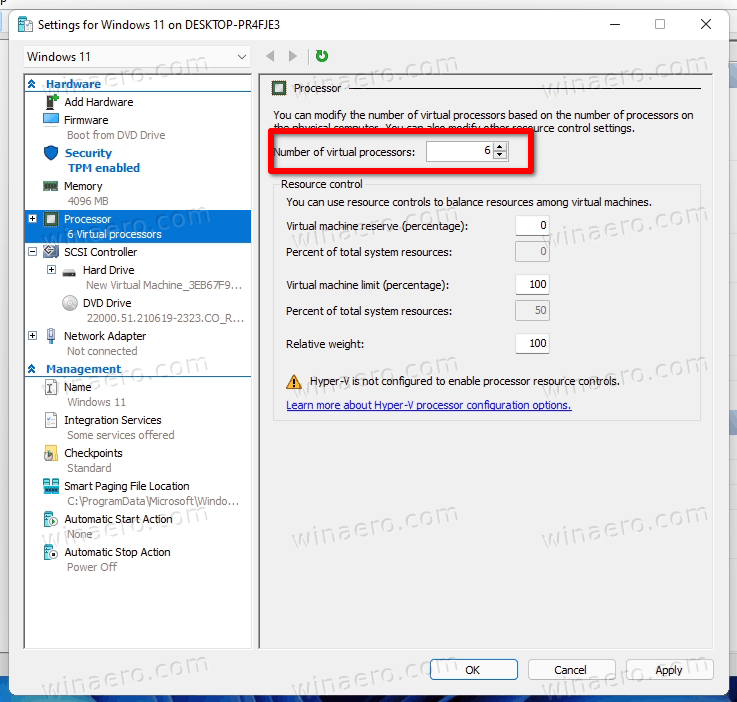
- Switch to the Processor section on the left.
- Set the Number of virtual processors value to at least
2.
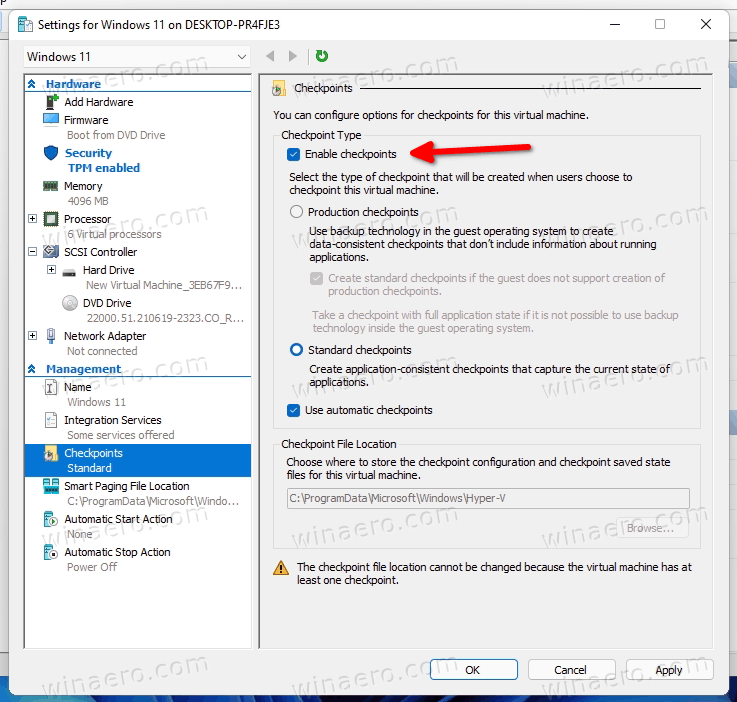
- Now, I recommend you to switch to Checkpoints Settings and enable checkpoints if they are disabled. That's a really great feature that allows to quickly restore a broken VM without reinstalling the guest OS.
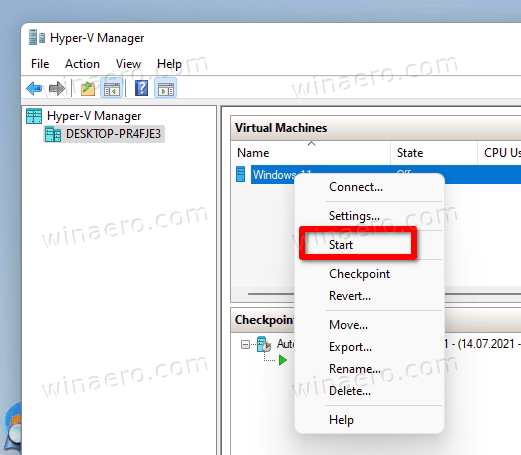
- Finally, right click your VM, and select Start from the context menu.
- Once you see the message Press any key to boot from CD or DVD..., it means you have initiated Windows 11 setup. Press any key to proceed.
- If you miss the time to press any key, select Actions > Reset from the Hyper-V menu. Or press Ctrl + R.
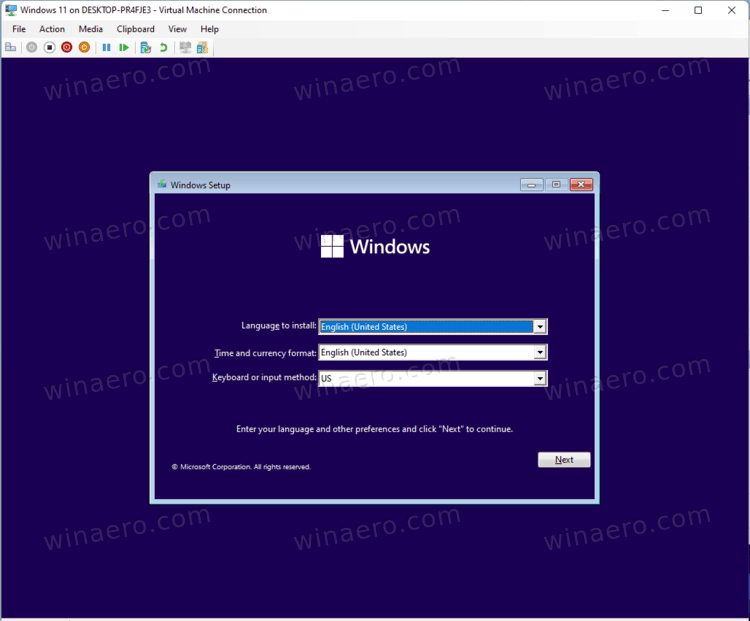
- Once you see the Windows Setup dialog, continue at the "Do a clean install of Windows 11" chapter in this post on Winaero.
By carefully following the above steps, you will get Windows 11 installed in Hyper-V. It will be your best friend for testing new apps, settings, and even unstable builds of the OS.
That's it!
