As a regular user of network drives, the error “the specified network name is no longer available” is something common. It will pop-up the moment you try accessing the NAS drive. However, there is solution to fix this issue, lets start.
For some people, even after being able to access the drive; they will come across the same message while synchronizing offline files from the NAS. If the issue persists at the time of synchronizing, then re-synchronizing the same may work. Still, there are chances that the error will appear.
Quick Overivew
What are the Reasons that May Lead to this Error?

There are numerous reasons that result in reflecting the error message “the specified network name is no longer available”. Some of the most common ones include the following:
- Accessing the files on the server by the bot
- Running of Server 2008 R2 standard 64-bit by both servers
- Virtualization of servers on VMware (also check sandboxie similar software)
- Availability of both servers in the same subnet
- Running of the anti-virus by the bot server, but unfortunately, the file server has no anti-virus program installed
- Accessing the path on the file server via an IP address instead of hostname
- Windows firewall is turned on for the file server, but off for the bot server
- Servers are in a particular workgroup
- Servers are having the service related to computer browser disabled
- The bot having full control over the file server directory
If you are constantly coming across this error message, then it is time to fix it.
How to Fix “The specified network name is no longer available” Error?
Below are some exclusive ways of fixing the error message “the specified network name is no longer available”:
Method 1: Enabling SMB version 1
In the latest version of Windows 10, the problem is generally caused by the SMB version 1. It is by default not installed. A statement released by Microsoft clearly states that establishing a connection with a device supporting the first version of SMB will result in error followed by popping up of an error message.
Hence, enabling the same from the Control Panel is expected to resolve the issue in the best manner. Below are the steps:
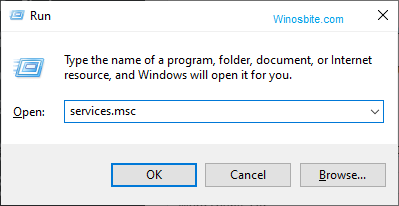
- Opening the Command Prompt by pressing Windows Key + R

- Type appwiz.cpl followed by pressing Enter

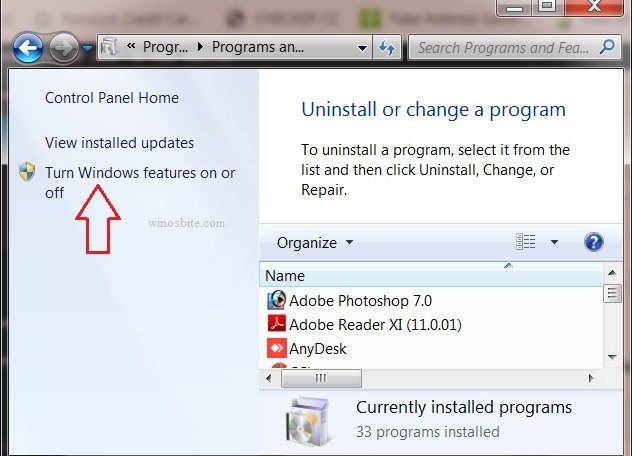
- Clicking on “Turn Windows Features on or off”, scrolling down and locating the option “SMB 1.0/CIFS File Sharing Support”


[NOTE: If there is a plus sign, then it is an indication that the SMB 1.0/CIFS File Sharing Support is enabled. Else, checking the option of SMB 1.0 / CIFS File Sharing Support will be the best step.]
- Clicking OK will hopefully solve the issue.
Method 2 – Disabling AV and Network Scanning
The error message “The specified network name is no longer available” may be caused by the antivirus program in the system. If Nod32 is being used, then this problem is common.
In such a situation, disabling the real-time network scanning along with antivirus is the best option. If the problem gets solved, then it is alright. Otherwise, map networking of the drive will be another option.
Method 3 – Mapping the Network Drive with IP Address
Mapping the network drive by using the IP address will be another alternative to solve the problem of popping up of error message “The specified network name is no longer available”.
- To carry on with the process, the following steps must be followed:
- Opening File Explorer by holding Windows Key + E followed by clicking the computer option (My PC)

- It is preferable to click on the top part. Clicking on the lower part of the button will present 2 different options:
- Map network drive
- Disconnect network drive

- Selecting Map network drive followed by selecting the drive from the drop-down menu will provide you a space to enter the IP address.
- Once done, clicking on the Finish option will help in resolving the issue.
If none of the above steps work, then better re-boot your computer system and consult your network administrator.
Conclusion
The above-mentioned methods are easy to use to fix “The specified network name is no longer available” in Windows 10 and 11. If you still facing any other issue, then do let me know by adding your comment below.

