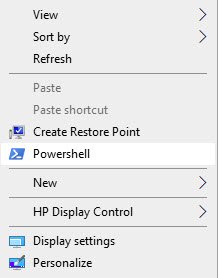
In Windows 10, the Context menu is the GUI (Graphical User Interface) menu which appears when you right-click on the mouse. This menu offers a limited set of options or choices depending on the application or operating system. The context menu can appear on any application that offers a lot of options for easy and efficient operation. In this post, we will show you how you can easily add PowerShell to the context menu in Windows 10.

Add PowerShell to Context Menu in Windows 10
To add PowerShell to the context menu in Windows 10, follow our instructions outlined below.
- Press Windows key + R to invoke the Run dialog box.
- In the Run dialog box, type regedit and hit Enter to open Registry Editor.
- Navigate or jump to the registry hive location below:
HKEY_CLASSES_ROOT\Directory\shell
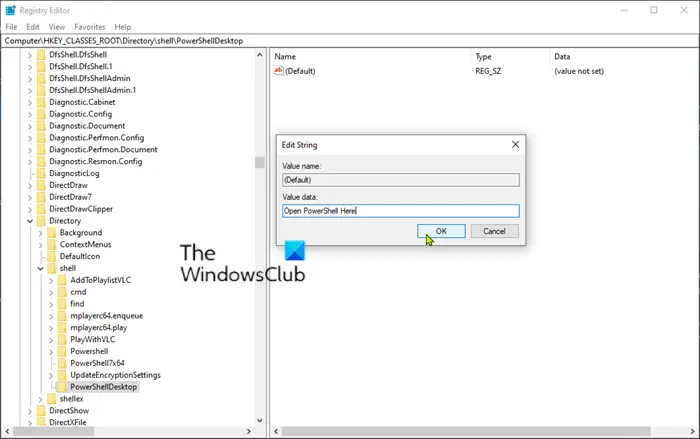
- On the left pane, right-click on the shell key and choose New > Key and name it PowerShellDesktop.
- Click on the newly created PowerShellDesktop key.
- On the right pane, double-click the Default string value to edit its properties.
- Type Open PowerShell Here in the Value data field.
- Click OK.

Again, on the left pane, right-click on the PowerShellDesktop key and choose New > Key and name it Command.
- Click on the newly created Command key.
- On the right pane, double-click the Default string value to edit its properties.
- Copy and paste the string value below into the Value data field.
C:\Windows\system32\WindowsPowerShell\v1.0\powershell.exe -NoExit -Command Set-Location -LiteralPath ‘%L’
Windows PowerShell default path is C:\\Windows\\system32\\WindowsPowerShell\\v1.0\\powershell.exe.
If you installed Windows on any other partition then you need to search the PowerShell path. Also, if you installed any other version of PowerShell, then change the v1.0 to the current version installed on your machine.

